SEWING:
After receive the garments components from cutting section, all the garments parts are joined and sewn as sequentially. Obviously all the components are sewn respects on buyer requirement.
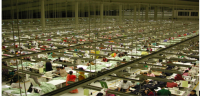
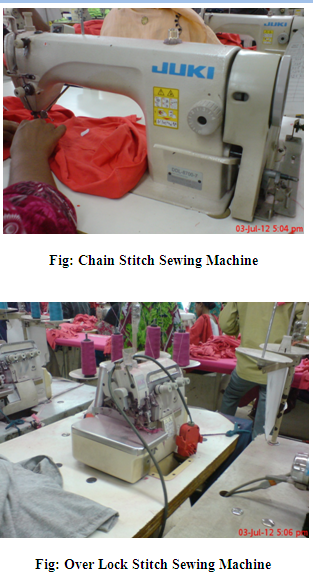
Sewing section is the most important department of a garment manufacturing industry. Sewing machines of different types are arranged as a vertical line to assemble the garments. Sequence of types of sewing machine arrangement depends on sequence of assembling operations.
SEWING SEQUENCE OF T-SHIRT MANUFACTURING PROCESS:
Number matching front 2 back part (back on part on upper side)
↓
Shoulder stitching (By over lock m/c)
↓
Neck rib truck (By plain m/c)
↓
Neck rib sewing by plain m/c
↓
Neck rib joins with body pant
↓
Neck top sin
↓
Solder to solder back tip
↓
Size label sewing
↓
Solder to solder back top sin
↓
Sleeve marking and number matching with body parts.
↓
Sleeve tuck with body part (Sleeve mark point & solder mark point)
↓
Sleeve joint with the body part
↓
Side sewing and care label joint
↓
Bottom hem tuck (at the end side)
↓
Bottom hem sewing
↓
Arm bottom hem joint
↓
Inspection
SEWING SEQUENCE OF POLO SHIRT MANUFACTURING PROCESS:
Lining joint with collar part by heat pressing
↓
Collar marking for open stitch
↓
Collar inside open stitch
↓
Collar marking
↓
Collar ¼ top sin
↓
Collar cutting
↓
Band rolling
↓
Band joint with collar
↓
Band top sin 1/6
↓
Placket lining
↓
Placket marking
↓
Placket rolling
↓
Placket joint
↓
Placket top sin1/6
↓
Placket pattern top sin
↓
Placket pattern top sin 1/6
↓
Box sewing
↓
Pocket rolling
↓
Pocket Iron
↓
Pocket marking
↓
Pocket joint with body
↓
Yoke joint with back part
↓
Yoke ¼ top sin
↓
Back and front part matching number
↓
Collars join with body part
↓
Collar top sin in joining part
↓
Sleeve making
↓
Sleeve over locked
↓
Sleeve rolling
↓
Sleeve pair matching
↓
Sleeve and body matching
↓
Sleeve body tuck
↓
Sleeve joint with body part
↓
Sleeve marking for batch
↓
Sleeve batch joint (left & right side)
↓
Body marking for batch
↓
Batch joint with body part
↓
Label make
↓
Label iron
↓
Main label joint in back side
↓
Sleeve opening tuck
↓
Body hem sewing
↓
Care label sewing
↓
Side joint
↓
Band tuck
↓
Band tape joint
↓
Band top sin
↓
Sleeve chap tuck
↓
Inspection
OPERATIONPROCESSOFFULLSLEEVE,ROLL NECK, T-SHIRT:
Total Machine:-26
↓
Over Lock-Shoulder Joining (2 M/c)
↓
Plain M/c-collar Joining (2 M/c)
↓
Overlook M/c- Neck Joining (2 M/c)
↓
Plain M/c- Main Label Joining (2 M/c)
↓
Plain M/c-Size Label Joining (2 M/c)
↓
Flat-Lock M/c- Sleeve Hem (2 M/c)
↓
Over-Lock M/c-Sleeve Joining (3M/c)
↓
Over-Lock- Side Seam joining With Care Level (4M/c)
↓
Plain M/c- Sleeve Attaching (IM/c)
↓
Plain M/c-Tuck (2M/c)
↓
Flat Lock M/c-Bottom Hem (2M/c)
↓
Bottom Hole (1 M/c)
↓
Bottom Attach (IM/c)
Line Balancing of Basic T-Shirt manufacturing process:
No. of m/c:
Shoulder joining-(O/L) = 1
Side cutting – (scissor)= 1
Neck making-(P/M) = 1+1
Neck Joining-(O/L) = 1+1
Label attaching (P/M) = 1+1
Piping (feed of the arm) = 1+1
Sleeve hem (F/L) = 2+1
2m/c Sleeve joining (O/L) = 3
2m/c Side seam (O/L) = 2
2m/c sleeve tuck (P/M)= 1
2m/c Bottom hem (F/L)= 2
After sewing, the sewn area is observed for any defects, if present which affects outlook. Normally it is expected that there will be no defective view of stitches, seam pucker or unsightly view.
There are various types of sewing problems found in sewing floor. Among these problems are stitch formation, seam pucker and fabric damage in the seam line.
Sewing problem:
Sewing defect can be classified in three different groups:
- Stitch formation
- Seam pucker
- Damage of fabric on seam line
Stitch formation:
- Slipped stitch:
Causes:
If hook or looper& needle are not inserted in loop of thread in time
Irregular thread tension on upper or power loop
Due to needle deflection
If needle thread loop size is too small
If the sewing thread is not capable to form loop
Remedies:
Placing of needle properly
The tension of thread should again be adjusted
Needle to be changed
Needle size & thread size must be adjusted
- Staggered stitch:
Causes:
Needle deflection
Due to wrong or blunt needle point
Wrong adjustment of needle and thread size
Defected motion of feed dog
Remedies:
Increase the needle size
Needle to be changed
Needle size and thread size to be changed
Motion of feed dog to be adjusted
- Unbalance stitch:
Causes:
Wrong tension of sewing thread
Used wrong thread path
Wrong adjustment of needle thread path
If the thread is not lubricated
Remedies:
Setting of proper tension to the sewing thread
Use of right thread path
Better qualities threads must be used
- Variable stitch density:
Causes:
Twisting of thread in the thread guide
More tension to the thread
Improper unwinding of thread from package during sewing
Fraying of thread in the needle
Remedies:
Proper threading of sewing thread during sewing
The tension of thread should be less or use of higher strength threads
The position of thread guide must be 2.5 times higher than the position of thread package.
Finer threads must be used or to be used heavy needle
Seam pucker:
- Variable or uneven stretch on fabric plies:
Causes:
There is a great possibility of seeing seam pucker in case of more plied of fabrics sewing together.
Due to variable stretch on fabric plies they will not feed equally to sewing m/c and create seam pucker.
This type of pucker is seen for the limitation of feed mechanism.
- Fabric dimensional instability:
If the shrinkage of sewn fabric plies are not same or equal than seam pucker will create after washing.
To avoid this, it must know the shrinkage property of different types of fabric before sewing.
If the shrinkage percentage of area of two pieces fabrics is more than 2, then seam pucker will occur after sewing the fabrics together.
- Extension of sewing thread:
Different types of tension are placed on sewing thread during sewing of fabrics. If the tension on needle thread is higher than under thread than seam pucker will produce or relaxed.
Due to tension, the length of thread is extended a slight.
If the shrinkage percentage of thread and fabric are same, there is no possibility of seam puckering.
- Sewing threads shrinkage:
Due to variable shrinkage % of sewing thread and fabric, seam pucker will create after washing or ironing.
To protect this, it must know about the shrinkage percentage of fabric and thread before selection to sew.
- Mismatched pattern:
Seam pucker will create when two different size patterns are sewn together.
The designer is responsible for this. But can be occurred due to wrong selection of patterns.
Damage of fabrics on seam line:
- Mechanical damage:
Damaging of fabrics or yarns in the fabrics by needle is the entire defects of mechanical damage. The following are the steps to be taken to keep the fabrics free from this type of defect:
By using perfect size and shape of needle and needle point without any defect.
By reducing the speed of sewing machine.
By testing sew ability before sewing fabrics.
- Needle heating damage:
The damage of fabrics due to the friction occurred between the needle and fabrics. The producing temperature in the needle may be form 300°C to 350°C. The fabric can be damaged with this temperature. The following are the steps to be taken to keep the fabrics free from this type of defect:
By reducing sewing speed so that there is less generating of heat to the needle. But it also harmful for large production.
By changing needle size and shape so that there is less generating of heat to the needle.
By sewing smaller length at higher speed.
By using Teflon coated needle
- Ø Another sewing stage problem:
| Effect | Cause |
| Excessive Trimming Wastage | Due to Lack of awareness among workers in Sewing excessive edge trimmings are found |
| Incorrect machine Setting | Machine settings Such as feed dog movement are not correlate to the fabric surface properties and leads to pull/pucker the fabric |
Various types of garments defect:
- Broken buttons
- Broken snaps
- Broken stitching
- Defective snaps
- Different shades within the same
- Dropped stitches
- Exposed notches
- Inoperative zipper
- Loose / hanging sewing threads
- Missing buttons
- Needle cuts / chews
- Open seams
- Pulled / loose yarn
- Stain
- Unfinished buttonhole
- Zipper too short
- Exposed raw edges
TRIMS AND ACCESSORIES:
To full fill the design objectives we need different kind of materials. Fabrics are the main material, which used for garment manufacturing. We need other materials also, which make the garments aesthetic, functional and commercially required. Usually other than fabrics this material used for making garments are called trims and accessories.
Trims: The Raw materials which are used in the sewing section other than fabric are called trims. These are the materials which are directly attached with the fabric to make a garment completely wearable.
Accessories: The Raw Materials which are used to make a garment attractive for sale and packing accept fabric and trims are called accessories. They are not directly attached with the garment. It is used only to make the garment attractive.
List of Trims and accessories:
SL | Trims | SL | Accessories |
1 | Label (S) | 1 | Poly bag |
2 | Button | 2 | Elastic bag |
3 | Zipper | 3 | Mini Poly bag |
4 | Padding | 4 | Master Carton |
5 | Interlining | 5 | Inner carton |
6 | Down | 6 | Size clip |
7 | Elastic | 7 | P. P. band |
8 | Thread | 8 | Tag pin |
9 | Twill Tape | 9 | Brass pin |
10 | Stopper | 10 | Collar stand |
11 | String/ Draw Cord | 11 | Safety pin |
12 | Piping Cord | 12 | Gum tape |
13 | Emblem | 13 | Arrow sticker |
14 | Logo print | 14 | Scotch tape |
15 | D- Ring | 15 | Barcode Sticker |
16 | Swivel Hook | 16 | Defect indicator |
17 | Eyelet/ Grommet | 17 | Tissue paper |
18 | Collar Stay | 18 | Back board |
19 | Cord Bell | 19 | Neck board |
20 | Buckle | 20 | Butterfly |
21 | Rivet | 21 | Numbering stickers |
22 | Weaving belt | 22 | Hanger |
23 | Hook & Eye | 23 | Size sticker |
24 | Velcro tape | 24 | Carton pad |
25 | Seam sealing tape | 25 | Both side tape |
26 | Shoulder pad | 26 | Plastic staple |
27 | Cable | 27 | Iron seal |
28 | Adjuster | 28 | Clip |
29 | Elastic Threads | 29 | Size Tag |
30 | Shoulder Tape | 30 | Carton Sticker |
A short description over some of the important trims and accessories is as follows: Buttons: Various types of button are available in the market. Merchandiser has to have a good knowledge about all types of button. Some the types are as follows:
- Pearl button
- Horn button: It is also polyester button
- Chalk button
- Polyester button
- Imitation leather
- Polyester imitation button
- Nylon button
- Alloy button
- Jeans button
- Snap button: 2 ports & 4 ports
- Press button
- ABS button
- Handicraft button
- Fabric Covered button
- Coconut button
- Wooden button
- Real horn button
- Real Shell button etc.
Zipper:
- Depend On End
Open end Zipped:
Right insertion of sleeve & left puller (Men’s)
Left insertion of sleeve & Right puller (Women’s)
Depend On Teeth Size:
- 3 SIZES
- 4 SIZES
- 5 SIZES
It depend on teeth length it 3 mm then size 3.
Depend On Tape:
- Polyester
- Cotton
Depend On Puller:
- Double puller
- Single
Depend On Slider Lock:
- Auto lock
- Semi locks
- Non lock
Depend On Teeth Material:
- Nylon: shiny rainbow, shiny gold, shiny silver, antic brass.
- Metal: brass, antic brass, nickel brass, aluminum, pewter.
- Plastic on derlin: ivory, translucent, shiny gold, silver rainbow
- Plastic on derlin: ivory, translucent, shiny gold, silver rainbow.
Packing Accessories:
The Accessories which are used for garment packing during garment shipment to buyer are called packing accessories. Packing accessories are depended on garment packing and folding etc which is instructed by buyer.
Poly bag, packing board, tissue paper, hanger, scotch tape, gum tape, carton etc are part of packing accessories.
Packing should be varying (as per buyer garment packing instruction) in different orders as per instruction of buyer garments packing. , The number of one carton garments it is weight on depend carton quality.
Understand quality of carton follow 3 ply, 5 ply, 7ply.
The number of carton is high ply number it is very much it is hard and strong.
The sea frights depend on dimension of the export carton and the air frights depend on dimension of the export carton or gross weight of the carton.
Type of Carton:
1. Depend on paper : Khaki carton or brown carton
Duplex carton
Box carton
2. Depend on stitching : Stitching carton
Now stitching /gum pasting carton
3. Depend on ply : 3 ply carton
5 ply carton
7 ply carton
4. Depend on liner : Both side liner cartons
Outside liner carton
5. Depend on size : Master carton
Inner Carton