Although I dislike using AI to replace the creative process, I believe it can greatly improve picture quality. You can save photos that might not have been used without the proper AI tools. Such a tool is Topaz Photo AI, and in this piece, we examine its features, constraints, and best practices.
The growing list of AI tools that Topaz provides now includes Photo AI. I didn’t have a lot of time to experiment with it for my picture editing when they first introduced it last year because I was still traveling through Asia. I shot a lot of photos during those trips, some of which had poor image quality. My Canon 70-200mm f/4 lens wasn’t long enough on occasion, and on other occasions, I had to raise the ISO higher than I felt safe.
A few months later, as I browse through the pictures from those trips, I made the decision to give Topaz Photo AI a try. And one thing that favorably surprised me was the quality I was able to breathe into some of my trickier captures.
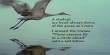
Wildlife: Wildlife photography is a fantastic application for picture AI. I yearned for a good telescopic lens while I was in Malaysia. A 400mm or 500mm lens would have given me much more opportunities to photograph the elusive wildlife while exploring Borneo. Because I knew the quality wouldn’t be good enough, I snapped many photos, like the one of an eagle below, more to record my travels than for my portfolio.
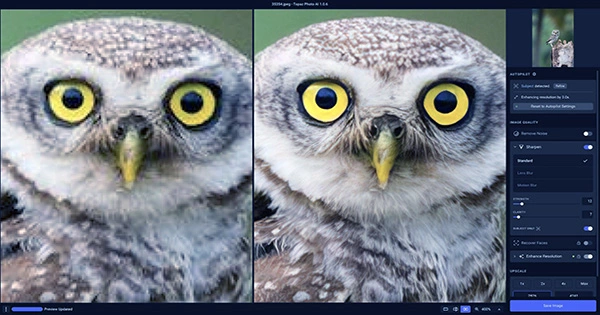
This picture was the first one I altered with Photo AI after buying it. In one piece of software, I doubled the resolution, decreased the noise, and added some features. You can see how the image quality has improved by comparing the before and after images below. A 100% copy of the image is displayed. Although not perfect right out of the box, I could further enhance the outcome by making more precise changes in Photoshop.

Topaz Photo AI is available as a standalone program, a tool for Lightroom, and a component of Photoshop. You have a lot of freedom in Lightroom because you can even make adjustments to the raw data.
It’s essential to remember that Photo AI doesn’t always produce perfect results. During upscaling, there is still some randomness in how sharpness is applied and features are added. In the feature film, I demonstrate how I handle that situation. Use manual masking to take away the effect where Photo AI went too far if you have Photoshop or another program that lets you work with layers and masks. Load both the original picture and the AI-adjusted version into separate layers.
If you use the software’s upscaling function, it might also be a good idea to import the upsized image into Camera Raw and briefly apply Dehaze. It will highlight the ramping-up’s shortcomings. One of my YouTube subscribers brought up the fact that every time he upscales his raw pictures, he ends up with an unsightly checkerboard pattern. Even though it is undetectable now, the contrast will bring it into focus. Although I haven’t personally observed it, it doesn’t hurt to check.
Landscape: When working on outdoor photographs, the same level of scrutiny is necessary. When using Photo AI, after sharpening and noise reduction have been applied globally, you should 100% zoom in and look at the entire picture. There are places that have artifacts, fringes, odd hues, and over-sharpening. Mask those areas progressively using a black brush with a 20–30% opacity.
Photo AI does an excellent job for areas with small, random details. However, pay careful attention to contrast edges. It is where Intelligence frequently errs. The clone stamp tool may be sufficient to remove those fringes from smaller regions.
To get the outcome you see in the before and after comparison, I used Photoshop to adjust the photo’s contrast and colors in addition to denoising and sharpening.
Architecture: While I used Photo AI at the start of my photo-editing workflow for the first two instances in Lightroom, I also wanted to see how it could enhance an edit that was already complete. I selected one of my photos from Kuala Lumpur as an illustration. The clarity in this picture was already excellent, and there wasn’t much noise in it.
But before printing, I typically add more sharpening to enhance the details in such a picture. You can duplicate the layer holding your final edit or change it to a Smart Object and then use Photo AI’s algorithms on it because Photo AI comes with a Photoshop plugin. Even though the improvement is not as significant as in the first two examples, I was still able to enhance the image’s quality. Now, there is a little less noise and a little more clarity in the image.
But once more, caution was required. I had to manually remove some of the artifacts and fringes that were added to the image. Expect the cleaning up of the AI findings to take about 10 minutes in total. But if you want the best outcomes, in my view, this is time well spent.
Conclusion: As you can see from the samples, Photo AI is incredibly effective at enhancing an image’s resolution, sharpness, and removal of noise. The true advantage of Photo AI, however, does not come from using it on a global scale, as it does with most photo-editing tools. The best outcomes can be obtained by using it sparingly. That is the situation with the most recent version, at least. I have no doubt that software will continue to advance. And perhaps one day you won’t need to make any additional adjustments or mask the result of Photo AI.